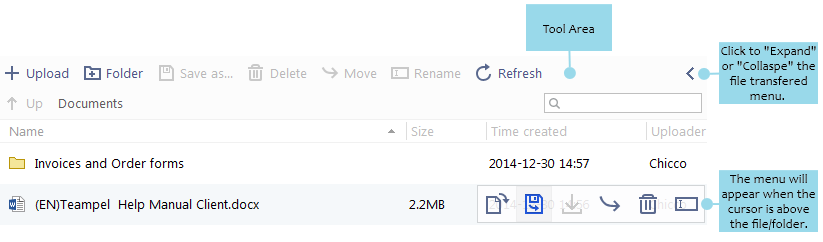
Upload file to project
- Select Document > Upload.Or drag and drop file into the "Document" window.
- Select the file to upload.
- Click "OK".
After files are uploaded to the project, they are immediately available for download, but only project leaders and the administrator can delete, rename or replace the files.
Set the visible range for the file
The files you upload to Teampel projects, by default all members can see them so to download, forward and quote them.But you can change the visibility settings of the files and only the specified members can see them.- Select "Document".
- Right-click the file you uploaded, click "Visibility settings" to open "Visibility settings" dialog box.
- Check "Visible to specified members" and click "Add" to select the specified member.
- Click the "OK" button, to finish editing。
Download project file
In the "Document" window, right-click the file and select "Download" from the menu or "Save as...".Note:Go to My profile > Setting > Local data > Project document downloaded to change the download path.
View download history of the project file
In "Document" window, right-click the file and select "Download history" to open "Download history" window of the file.
Send project file as e-mail attachment
In the Document window, right-click the project file and select "Send e-mail" from the menu.
Quote the project file to chat as reference
Click the file reference in conversation to go to its folder directly.
- Right-click the file and select "Quote" from the menu.To put the file in the current project as reference, please select "Quote to current project".
- Right-click the chat input box and select "Paste" from the menu.
Forward project file to member (or group/project)
- Select "Document" in project conversation.
- Right-click the project file and select "Forward to member (or group/project)".
- In the pop-up dialog box, select the receiving member (or group/project).
- Click "OK".
Forward project folder to another project
- Select "Document" in project conversation.
- Right-click the folder and select "Forward to project".
- In the pop-up dialog box select the project to forward to.
- Click "OK".
Organize project files with folders
- Select Document > Folder and enter the name for the folder.
- Right-click the project file that you want to move into a folder and select "Move".
- In the Move dialog box, select the target folder.
- Click "OK".